What Is HueForge? Guide to 3D Printed Art
HueForge turns any 3D printer into an art tool. Learn how colored filament layers create photorealistic prints and what you need to start.
TL;DR
HueForge is software that helps you turn regular images into 3D-printable art. You assign colors to different layers and swap filament during the print. Light passes through the layers and blends the colors together. Any FDM printer that runs PLA can do it. No special hardware or multi-material system needed. The technique is called filament painting, and in skilled hands, the results look almost photographic.
HueForge lets you turn a normal 3D printer into a tool for making full-color art.
You've probably seen those prints that look like photographs but are made entirely from plastic filament. No special ink. No hand painting. No multi-material unit swapping colors behind the scenes. That's HueForge.
The barrier to entry is much lower than most people think. This guide covers what HueForge actually is, how it works, what you need to get started to create your own, and where to find models worth printing.
What Is HueForge?
HueForge is a software tool that helps you turn 2D images into multi-color 3D print files. The technique is called filament painting. It models how light moves through layers of colored filament, giving you tools to create blended colors, gradients, and detailed images from basic PLA and layer swaps.
Unlike a slicer (the software you normally use to prepare print files), HueForge isn't focused on exact size and shape. Its entire focus is color. It uses a measurement called Transmission Distance (TD) to predict how light will pass through each layer. That's how it figures out what the final colors will look like when layers are stacked.
You give HueForge an image file and your available filament colors. From there, you map those colors to specific layers and decide where each swap should happen. The software shows you a live preview, but the creative decisions are yours. Getting a design to look right takes experimenting, adjusting, and trying again. Right might be pretty accurate to the original, or a custom color combo all your own.
Once you're happy with the result, you export a standard file, open it in any slicer, set the color swaps, and print on your existing machine.
You can purchase a HueForge license directly from the official shop. There are options for personal use and commercial use depending on your needs.
How Does Filament Painting Work?
Filament painting works by stacking thin layers of different colored filament on top of each other. Light passes through them and blends the colors together. How thick and how transparent each layer is determines how much of its color shows through.
Think of it like sheets of tinted glass. A single yellow sheet looks yellow. Put a blue sheet behind it, and the overlap looks green. The thicker the yellow sheet, the more yellow you see. The thinner it is, the more blue comes through.
That's exactly how HueForge works with filament. And it all comes down to one key concept: Transmission Distance.
Understanding Transmission Distance (TD)
Transmission Distance (TD) is a number that describes how much light a filament lets through. A low TD means light can't pass through easily. A high TD means more light gets through. This controls how much of the colors underneath you can see.
TD is the foundation of every calculation HueForge makes. When you tell it "I have Bambu Lab Basic Black and Bambu Lab Basic Jade White," it looks up the TD for each one. Then it figures out how thick each layer needs to be for the colors to blend the way you want.
Many popular brands already have their TD values in HueForge's built-in library. Polymaker, Bambu Lab, and eSUN all have extensive entries. If your filament isn't listed, you can measure TD yourself with a test print or a dedicated sensor like the TD-1.
This sounds intimidating, but it isn't. For your first few prints, stick with filaments already in the library and you're covered.
Front-Lit vs. Backlit Prints
HueForge prints come in two main styles. Front-lit prints (sometimes called filament paintings) are designed to look great in normal room lighting, like a painting on a wall. Backlit prints work more like stained glass, with an LED panel or light source behind them that makes the colors glow.
Both use the same core technique. The difference is how HueForge calculates layer thickness based on the direction of the light.
Most beginners start with front-lit prints since they don't require any extra hardware beyond the printer itself. They also tend to be popular with most buyers or as a gift, since the effect is super easy to see.
How HueForge Works
What's the Difference Between HueForge and a Lithophane?
A lithophane is a single-color 3D print that creates a grayscale image by varying the thickness of the material, and it only looks good when backlit. HueForge produces full-color images using multiple filaments that look great in normal light without any backlighting required.
If you've been in the 3D printing world for a while, you've probably seen lithophanes. They've been around much longer. A lithophane varies the thickness of a single-color print so that thicker areas block more light (darker) and thinner areas let more through (brighter). You only see the image when you hold it up to a light source.
HueForge evolved from the same basic idea, but takes it further. Instead of varying thickness in one color, it stacks multiple colors and uses each layer's transparency to blend them into a full-color image.
Here's a quick comparison:
Lithophanes use one filament color, produce grayscale only, require backlighting, and create the image through thickness variation.
HueForge prints use two or more filament colors, produce full-color images, look great in normal room light (or backlit), and create color by stacking layers with different transparency.
You can still make backlit prints with HueForge, and they look stunning. But you're not limited to backlighting the way you are with a lithophane.
What You Need to Get Started
Getting into HueForge doesn't require a big investment or specialized equipment. Here's what you actually need.
A 3D printer. Any FDM printer that produces consistent layers will work. No specific brand required. No AMS, MMU, or multi-material system needed either. Most HueForge prints in the community were made with manual filament swaps on single-extruder machines. If your printer can lay down clean, even layers with PLA, you're good.
PLA filament in at least two colors. PLA is the standard because it has well-documented transparency and prints easily. Start with a dark color (black works for almost everything) and a light color (white or jade white). Two to four colors will cover a surprising number of models. Stick with brands already in HueForge's library so you can skip calibration. Polymaker, Bambu Lab, and eSUN are all well-represented. The real cost per print is lower than most people expect.
HueForge software. You'll need a license from the official HueForge shop. Personal and commercial options are available.
A slicer. You almost certainly already have one. HueForge exports a file you open in Bambu Studio, PrusaSlicer, OrcaSlicer, Cura, or whatever you normally use.
That's it. If you own a 3D printer and a few spools of PLA, you could be printing today. Our beginner's printing guide walks through the full setup if you want a deeper dive.
Two Ways to Get Into HueForge
There are two distinct paths into HueForge, and they involve very different levels of effort. Understanding which one you're signing up for will save you a lot of confusion.
Path 1: Design Your Own Prints
This is the full HueForge experience. You import an image, choose your filament colors, and map them to specific layers. The software gives you tools to preview and adjust, but the creative decisions are yours. You decide which filaments go where and tweak until the preview looks right.
This is not a one-click process. Choosing filament colors that work together takes real thought. Tonal value matters more than the color name on the spool. You'll experiment with different color stacks, adjust how much of each layer shows through, and learn how TD affects the final look. Most people go through several rounds before they're happy with a design.
The payoff is that you can turn any image into a print that's uniquely yours.
Path 2: Print Models Other Designers Have Already Made
This is where most beginners start, and plenty of experienced makers stay here too. Thousands of designers have already done the color mapping, TD tuning, and testing. They publish finished models on MakerWorld, Patreon, and other platforms, often with specific filament recommendations.
Your job is to get the right filaments, load the file into your slicer, and print it. You still swap filament at the right layers, but the design decisions have been made for you.
The challenge on this path is different: finding a model you want to print, from a designer you trust, that works with the filament you already own. We'll come back to that.
The Printing Process (Both Paths)
Regardless of which path you take, the printing steps are the same once you have a model file ready.
Export and slice. HueForge generates a file you bring into your slicer. Slice with your normal PLA settings. The file includes markers for each color change.
Print with color swaps. Start the print. When it pauses at a color change layer, swap the filament and resume. A two-color print has just one swap. A complex piece might have four or five. Each swap takes under a minute.
Enjoy. Peel it off the bed and you're holding finished art. Some people add a frame or backlight, but it looks great as-is. Our guide on displaying your finished prints covers presentation options.
Where Do You Find HueForge Models to Print?
HueForge models are created by individual designers and published across platforms like MakerWorld and Patreon. HuePick brings over 11,000 of these models into one searchable directory so you can find designs that match the filament you already own.
Whether you're on the "print existing models" path or designing your own, you'll end up looking for other people's work at some point. That's where the friction starts.
The designs exist. There are thousands of incredible ones out there. But they're spread across different platforms. A designer might post free models on MakerWorld and premium work on Patreon. Another might only be on one platform. Finding something you want to print, that also works with the filament you already own, takes a lot of browsing.
We built HuePick to solve this. It brings over 11,000 models from 50+ curated designers into one searchable directory. Search by subject, filter by designer, or sort by what's new. Every model links to its original source for downloading.
Where it gets really useful is the My Filament inventory. Add your spools, and HuePick shows a compatibility percentage for each model. "75%" means you already own three of the four colors needed. No more guessing whether you have the right filament before you commit.
If you want to skip straight to printing, the Print Now feature surfaces models ready to go with minimal setup.
See What's Possible
Real HueForge prints from the HuePick gallery
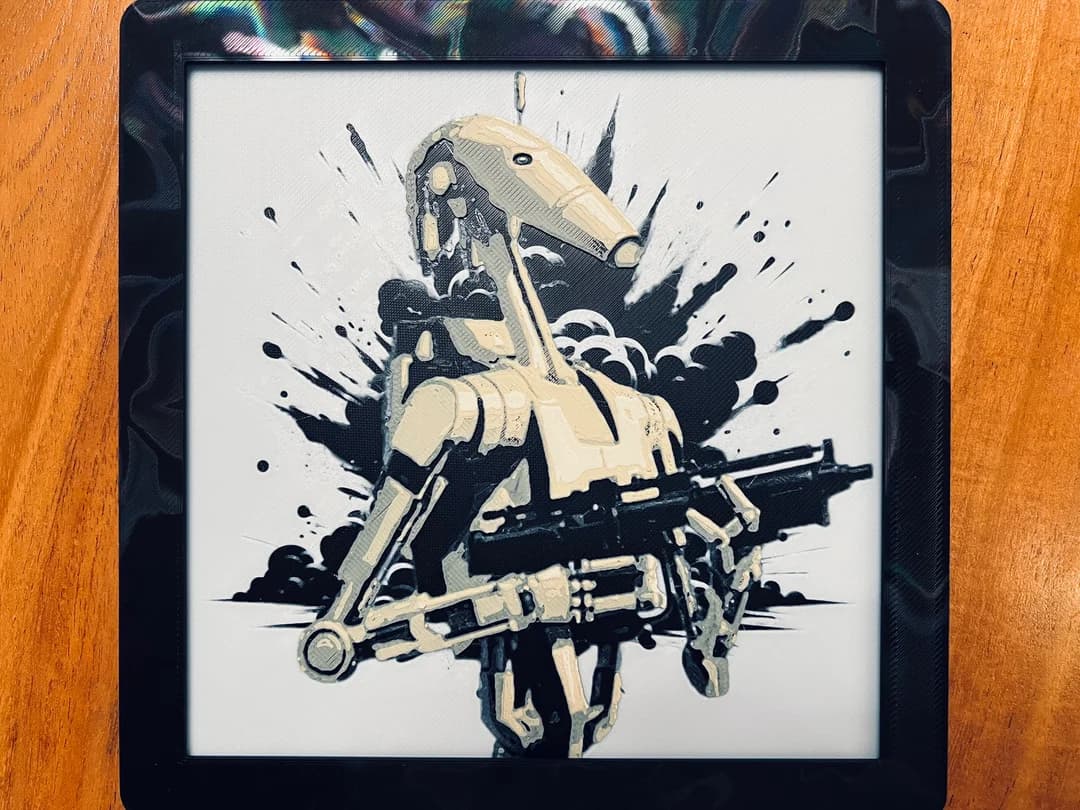
B1 Droid
by JustBe 3D Printing
Inosuke Hashibira — HueForge Art | Demon Slayer
by 3D Prints By Vic
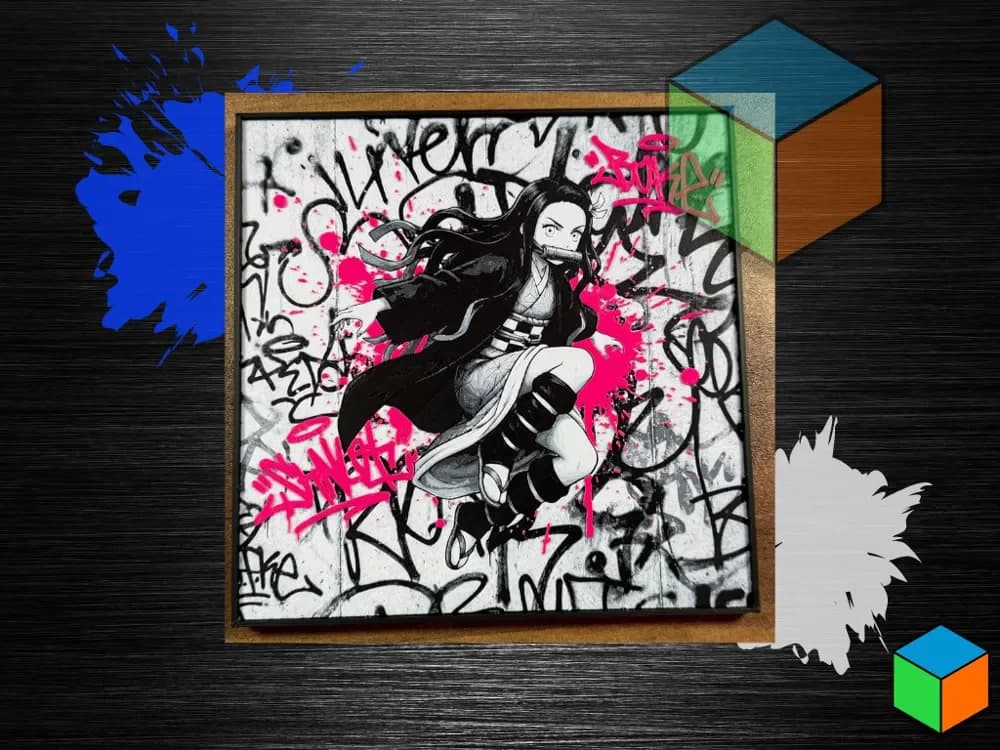
Nezuko Kamado — HueForge Art | Demon Slayer
by 3D Prints By Vic

Tanjiro Kamado — HueForge Art | Demon Slayer
by 3D Prints By Vic
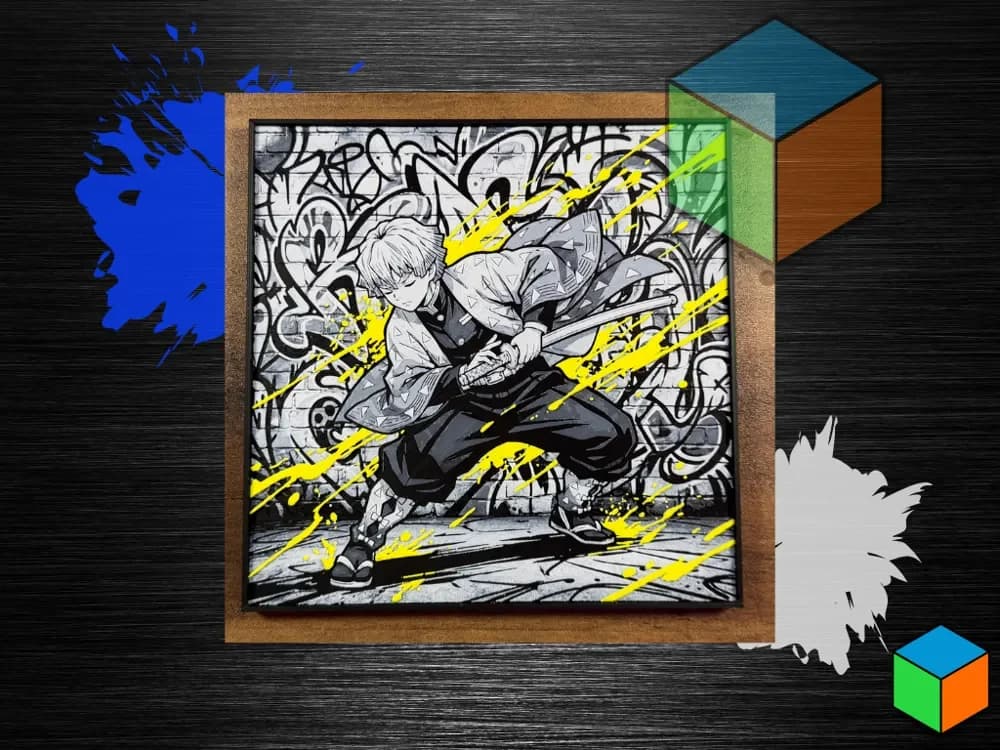
Zenitsu Agatsuma — HueForge Art | Demon Slayer
by 3D Prints By Vic

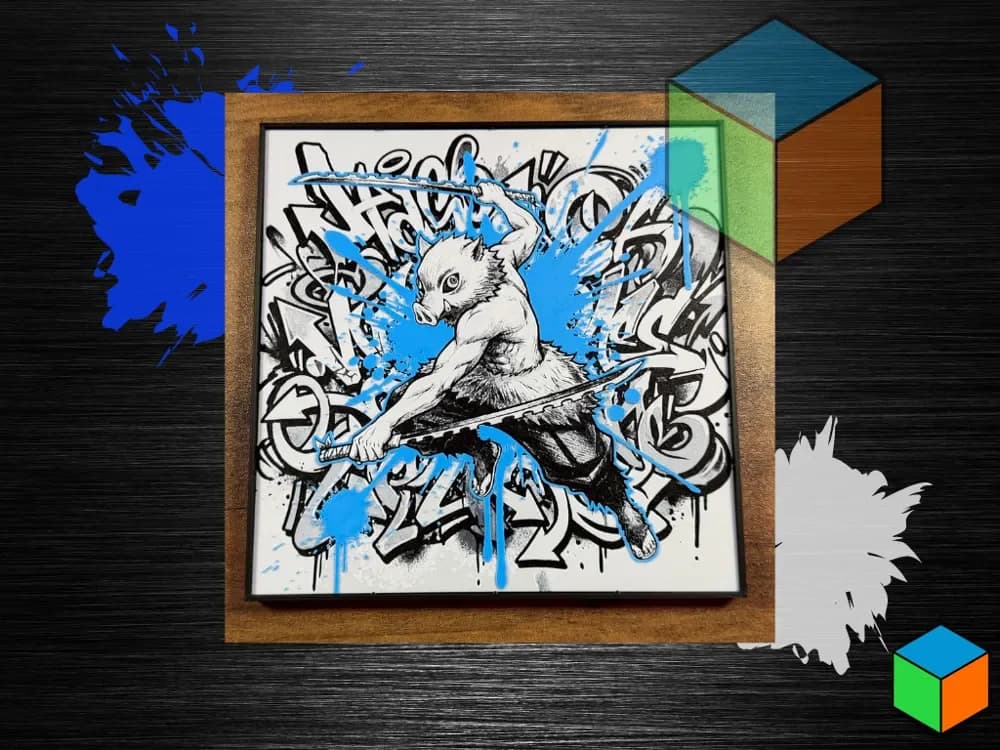
Orc
by BusyKikiBee
Tips for Your First HueForge Print
Your first print doesn't need to be ambitious. It needs to be successful. Here's how to set yourself up for a win.
Start with two to four colors. Every extra color adds a filament swap and another chance for something to go sideways. A two-color bookmark teaches you the full workflow with minimal risk.
Use filaments with known TD values. This isn't the time for that mystery spool from the back of the shelf. Pick filaments in HueForge's library so the color predictions are accurate.
Preview in your slicer first. Step through the layers in preview mode. Verify the color changes happen where you expect. Five minutes of previewing saves hours of reprinting.
Try a bookmark first. They're the community's go-to for first-timers. Small, fast (usually under two hours), and they use less filament. They also make great gifts.
Keep notes and take photos. Record which filaments you used and how the result compared to the preview. This becomes invaluable as you take on more complex projects.
The learning curve is short. Most people are making prints they're proud of within three to five attempts.
Wrapping Up
HueForge turns any FDM printer into a tool for creating full-color art. The equipment requirements are minimal, and the community of designers producing models grows every day.
If you're ready to try it, start by finding a design that matches the filament you already have. Browse the HuePick directory to search over 11,000 models from 50+ designers, filtered by the colors you own. Pick something simple, follow the steps above, and you'll be holding your first filament painting before the weekend is over.
Frequently Asked Questions
Is HueForge free?
HueForge is not free. It requires a paid license, which you can purchase from the official HueForge shop. There are different license tiers depending on whether you plan to use it for personal projects or commercial work. The software does offer a trial period so you can test it before committing.
Do I need an AMS or MMU for HueForge printing?
No. The majority of HueForge prints are made with manual filament swaps on single-extruder printers. When the printer reaches a color change layer, it pauses, you swap the filament by hand, and it continues. An AMS or MMU can automate this process, but it's completely optional.
What filament brands work best with HueForge?
Any PLA filament with known Transmission Distance (TD) values works well. Polymaker, Bambu Lab, and eSUN are among the most popular in the HueForge community because their filaments are well-represented in HueForge's built-in library. This means you can start printing without measuring TD values yourself.
How long does a HueForge print take?
Print time depends on the size and complexity of the model. A small bookmark might take one to two hours. A large wall art piece could run eight hours or more. The actual filament swaps add very little time, usually less than a minute each.
Can I sell prints I make with HueForge?
That depends on two things: your HueForge license type and the individual model's license. HueForge offers a commercial license for people who want to sell prints. Beyond the software license, each model designer sets their own terms for whether their designs can be used commercially. Always check the model's specific license before selling prints made from it.